Difference between revisions of "3D Printing Badge"
From TSAS Library
JStallings (talk | contribs) |
JStallings (talk | contribs) |
||
| Line 1: | Line 1: | ||
So you want to create some amazing things with the 3D printers? Excellent. This guide will | So you want to create some amazing things with the 3D printers? Excellent. To do so, you must demonstrate an understanding of the 3D printing process. This guide will walk you through the software you need to create and print a 3D model, as well as the process of using the printer itself. In the end, you'll have your very own badge that proves what you've learned! | ||
-Picture of the 3D printed badge- | |||
{{note|This page will show you how to create the badge; if you do not already have SketchUp installed, head back to [[SketchUp|Installing SketchUp and Extensions]]}} | |||
==Create the Badge== | ==Create the Badge== | ||
I shamelessly stole [http://info.library.okstate.edu/ld.php?content_id=24840778 this idea] from OSU's Edmon Low Creative Studios. Check the link for an image of the badge. | I shamelessly stole [http://info.library.okstate.edu/ld.php?content_id=24840778 this idea] from OSU's Edmon Low Creative Studios. Check the link for an image of the badge. | ||
{| | |||
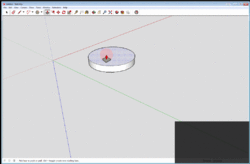
# Create a circle with the circle tool [[File:SketchUpCircle.jpg|20px]] by clicking on the ground, moving your cursor away from the center, and clicking again. Scale does not matter, because we will set final dimensions later | |-style="vertical-align:top;" | ||
# Choose the Push/Pull tool [[File:SketchUpPushPull.jpg|20px]], click the circle, and drag up to pull it into a short cylinder | | | ||
# Open SketchUp [[File:Sketchupicon.png|20px|SketchUp 2016 icon]] and play around with the tools. Scroll the scrolly wheel to zoom in and out, press the scrolly wheel like a button and move the mouse to orbit. Press shift while doing these for other movements | |||
# Create a circle with the circle tool [[File:SketchUpCircle.jpg|20px]] by clicking on the ground, moving your cursor away from the center, and clicking again. Scale does not matter, because we will set final dimensions later | |||
# Choose the Push/Pull tool [[File:SketchUpPushPull.jpg|20px]], click the circle, and drag up to pull it into a short cylinder | |||
|| | |||
[[File:SketchUpCreateCylinde.gif|250px|thumb|right|Steps 1–3]] | |||
|-style="vertical-align:top;" | |||
| | |||
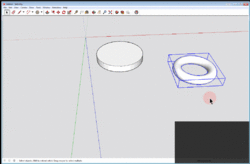
# Create a second circle for the top loop away from the model (we'll move it into place soon) | # Create a second circle for the top loop away from the model (we'll move it into place soon) | ||
# Click the middle of the circle and press delete; you will be left with just the outline | # Click the middle of the circle and press delete; you will be left with just the outline | ||
# Create one more circle perpendicular to the outline you made, and on the x or y axis (see [https://www.youtube.com/watch?v=n5wlYmTWI08 video], muted). This will make a torus | # Create one more circle perpendicular to the outline you made, and on the x or y axis (see [https://www.youtube.com/watch?v=n5wlYmTWI08 video], muted). This will make a torus | ||
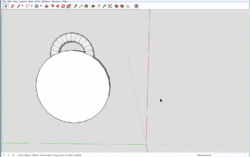
# Triple-click the torus (donut) | # Triple-click the torus (donut), right-click, then choose "Make Group." This will allow you to move the torus into the cylinder without them combining | ||
|| | |||
[[File:SketchUpCreateTorus.gif|250px|thumb|right|Steps 4–7]] | |||
|-style="vertical-align:top;" | |||
| | |||
# Align it with the cylinder as you'd like using the move tool [[File:Sketchupmovetool.jpg|20px]]. You can resize it by selecting it and choosing the Scale tool [[File:Sketchupscaletool.jpg|20px]] | # Align it with the cylinder as you'd like using the move tool [[File:Sketchupmovetool.jpg|20px]]. You can resize it by selecting it and choosing the Scale tool [[File:Sketchupscaletool.jpg|20px]] | ||
# Once the torus is in place, right click it and choose "Explode." This will tell the program to combine it with the cylinder | # Once the torus is in place, right click it and choose "Explode." This will tell the program to combine it with the cylinder | ||
# At the moment, there are no edges between the torus and the cylinder. This is a problem, because we need to delete any piece inside another piece, but if you try to delete without edge seams, it will leave holes. To create the edges, right-click the torus and choose "Intersect with Model" | || | ||
# Right-click the face of the badge, then choose "Hide." This lets you dig in the inside without erasing the face | [[File:SketchUpAlignTorus.gif|250px|thumb|right|Steps 8–9]] | ||
|-style="vertical-align:top;" | |||
| | |||
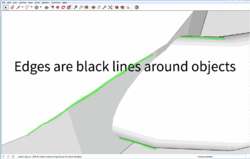
# At the moment, there are no edges between the torus and the cylinder. This is a problem, because we need to delete any piece inside another piece, but if you try to delete without edge seams, it will leave holes. To create the edges, right-click the torus and choose "Intersect with Model" | |||
|| | |||
[[File:SketchUpIntersectFaces.gif|250px|thumb|right|Step 10]] | |||
|-style="vertical-align:top;" | |||
| | |||
# Right-click the face of the badge, then choose "Hide." This lets you dig in the inside without erasing the face | |||
# Click the part of the torus inside the cylinder and delete it. Delete the two circles on the inside wall, as well | # Click the part of the torus inside the cylinder and delete it. Delete the two circles on the inside wall, as well | ||
# Go to "View" in the menu, and select "Hidden Materials" | # Go to "View" in the menu, and select "Hidden Materials" | ||
# Right-click the grid that appears where the face was, and choose "Unhide," then go to "View" and uncheck "Hidden Materials" | # Right-click the grid that appears where the face was, and choose "Unhide," then go to "View" and uncheck "Hidden Materials" | ||
# | || | ||
[[File:SketchUpDeleteInternalGeometry.gif|250px|thumb|right|Steps 11–14]] | |||
|-style="vertical-align:top;" | |||
| | |||
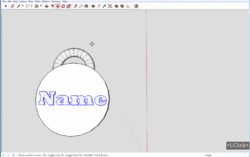
# Click the "Tools" menu up top, then choose the "3D Text" tool, write your name, and style as you'd like. Choose a font where the letters do not touch, or divide your name where they do. | |||
# Make it as large as will fit on the cylinder, and set it on top. | # Make it as large as will fit on the cylinder, and set it on top. | ||
# Right-click the text and choose "Explode." Again, this will merge it with the materials it is touching | # Right-click the text and choose "Explode." Again, this will merge it with the materials it is touching | ||
# Orbit to the backside of your badge (use the scrolly wheel as a button and move the mouse) | || | ||
[[File:SketchUpAddName.gif|250px|thumb|right|Steps 15–17]] | |||
|-style="vertical-align:top;" | |||
| | |||
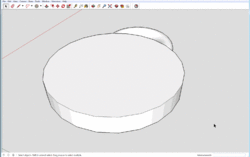
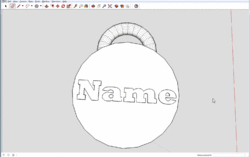
# Orbit to the backside of your badge (use the scrolly wheel as a button and move the mouse) | |||
# Hide the backside as you did the front | # Hide the backside as you did the front | ||
# Erase the backside of each letter. We are doing all this erasing to give the printer one single shell to print; imagine a very strangely-shaped balloon | # Erase the backside of each letter. We are doing all this erasing to give the printer one single shell to print; imagine a very strangely-shaped balloon | ||
# Go to "View" in the menu, and select "Hidden Materials" | # Go to "View" in the menu, and select "Hidden Materials" | ||
# Right-click the grid that appears where the backside was, and choose "Unhide," then go to "View" and uncheck "Hidden Materials" | # Right-click the grid that appears where the backside was, and choose "Unhide," then go to "View" and uncheck "Hidden Materials" | ||
# Admire your work | # Admire your work | ||
# Run Solid Inspector², which will make sure everything is watertight. (Remember the balloon? If there is a hole in your model, it will pop and not print!) | || | ||
# Go to "File, | [[File:SketchUpMakeManifold.gif|250px|thumb|right|Steps 18–23]] | ||
|-style="vertical-align:top;" | |||
| | |||
# Run Solid Inspector² [[File:Solidinspector2.png|20px|Solid Inspector 2 icon]], which will make sure everything is watertight. (Remember the balloon? If there is a hole in your model, it will pop and not print!) | |||
# Go to the "File" menu, then "Export STL" | |||
|| | |||
[[File:SketchUpCheckandExport.gif|250px|thumb|right|Steps 24–25]] | |||
|} | |||
Next: [[Slicing 3D Print Files]] | Next: [[Slicing 3D Print Files]] | ||
Revision as of 18:01, 24 April 2017
So you want to create some amazing things with the 3D printers? Excellent. To do so, you must demonstrate an understanding of the 3D printing process. This guide will walk you through the software you need to create and print a 3D model, as well as the process of using the printer itself. In the end, you'll have your very own badge that proves what you've learned!
-Picture of the 3D printed badge-
This page will show you how to create the badge; if you do not already have SketchUp installed, head back to Installing SketchUp and Extensions
Create the Badge
I shamelessly stole this idea from OSU's Edmon Low Creative Studios. Check the link for an image of the badge.
|
|
|
|
|
|
|
|
|
|
|
|
Next: Slicing 3D Print Files

